

How to check the oil level in a vertical cylindrical gear reducer?
Sep 15, 2026
Hey there, gearheads! As a supplier of Vertical Cylindrical Gear Reducers, I know how crucial it is to keep these machines in top - notch condition. One of the most basic yet important maintenance tasks is checking the oil level in a vertical cylindrical gear reducer. In this blog, I'll walk you through the process step by step.
Why Check the Oil Level?
First off, let's talk about why it's so important to check the oil level. The oil in a gear reducer serves several key functions. It lubricates the gears, reducing friction and wear. This helps to extend the lifespan of the gears and the entire reducer. It also helps to dissipate heat generated during operation. If the oil level is too low, the gears won't be properly lubricated, which can lead to increased friction, overheating, and eventually, gear failure. On the other hand, if the oil level is too high, it can cause excessive churning, which also generates heat and can lead to seal damage.
Tools You'll Need
Before you start checking the oil level, you'll need a few tools. You'll need a clean rag to wipe the oil dipstick or sight glass. A flashlight can also be handy, especially if the reducer is in a dimly lit area. And of course, you'll need the appropriate oil if you find that the level is low.
Step 1: Prepare the Reducer
The first step is to make sure the reducer is turned off and has cooled down. This is important for your safety. Hot oil can cause burns, and working on a running machine is extremely dangerous. Once the reducer is off and cool, you can start to access the oil - checking point.
Step 2: Locate the Oil - Checking Point
Vertical cylindrical gear reducers usually have either an oil dipstick or a sight glass. The dipstick is a long, thin rod with markings on it that indicate the proper oil level. The sight glass is a clear window on the side of the reducer that allows you to see the oil level directly.
If your reducer has a dipstick, it's usually located on the top or side of the reducer. You'll need to remove the dipstick, wipe it clean with the rag, and then re - insert it fully. After that, pull it out again and check the oil level against the markings on the dipstick.
If your reducer has a sight glass, simply look through the glass. The oil level should be between the minimum and maximum marks on the sight glass. Some sight glasses have a colored band or markings to make it easier to determine the proper level.
Step 3: Check the Oil Level
Once you've located the oil - checking point, it's time to check the level. If you're using a dipstick, the oil should be between the “min” and “max” marks. If the oil is below the “min” mark, you'll need to add oil. If it's above the “max” mark, you may need to drain some oil.
If you're using a sight glass, make sure the oil level is within the acceptable range. If it's not, you'll need to take action.
Step 4: Add or Drain Oil
If the oil level is low, you'll need to add oil. Make sure you use the type of oil recommended by the manufacturer. You can usually find this information in the reducer's manual. To add oil, remove the oil fill cap, which is usually located on the top of the reducer. Use a funnel to pour the oil slowly into the fill opening. Keep checking the oil level as you add oil to make sure you don't overfill it.
If the oil level is too high, you'll need to drain some oil. Locate the oil drain plug, which is usually at the bottom of the reducer. Place a drain pan under the plug, then remove the plug carefully. Let the oil drain until the level is within the proper range. Then, replace the drain plug.
Step 5: Clean Up
After you've checked and adjusted the oil level, clean up any spills. Wipe the dipstick or sight glass clean and replace the fill cap and drain plug if you removed them.
Tips and Tricks
- Regular Checks: Make it a habit to check the oil level regularly. How often you should check depends on how often the reducer is used. For heavy - duty applications, you may need to check the oil level weekly. For lighter - duty applications, monthly checks may be sufficient.
- Inspect the Oil: While you're checking the oil level, take a look at the oil itself. If it looks dirty, cloudy, or has metal particles in it, it may be time to change the oil.
- Follow the Manual: Always follow the manufacturer's instructions when it comes to oil type, oil level, and maintenance procedures. Each reducer may have specific requirements.
Related Products
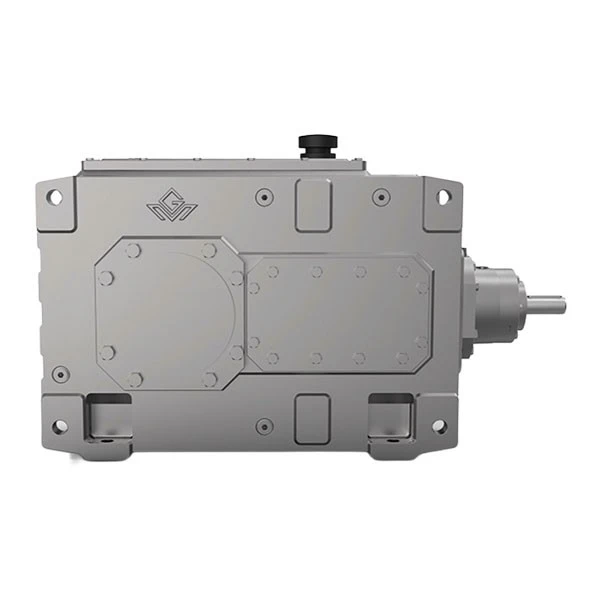
If you're in the market for a high - quality gear reducer, you might be interested in our Industrial Helical Gearbox. It's a great option for a wide range of industrial applications.
Contact Us for Purchase
If you have any questions about our Vertical Cylindrical Gear Reducers or need to purchase one, don't hesitate to reach out. We're here to help you find the right product for your needs. Whether you're a small business or a large industrial operation, we can provide you with the gear reducers you need to keep your machinery running smoothly.
References
- Gear Reducer Maintenance Manuals
- Industry - standard guidelines for gear reducer maintenance